前言
iPhone6 屏幕尺寸出现之后,大部分开发者都也开始使用起 Autolayout 来进行UI的布局了。相比之前的 autoresizingMask ,Autolayout 的有点不言而喻。之前自己一直用 storyboard 或者是 xib 来进行开发。感觉 Autolayout 就是几个约束,控件的拖拖拉拉,有趣也简单。直到最近。。。
当你开始进行多人项目合作,用拖拽来实现 Autolayout 的弊端就显现了,在两个人同时对一个 storyboard 文件进行修改,在 svn 上 进行文件 merge 时,文件往往是会有冲突的。而且有时冲突报错还是比较能以解决的。所以多人项目里一般会用纯代码来实现UI布局。于是与,我向我的实习导师借来了下面这本书:
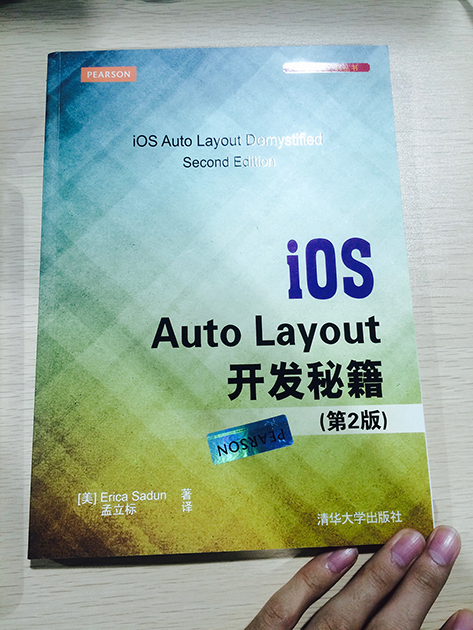
准备潜心修炼!
但是现实总是比较骨感的~这语法又臭又长~我觉得上面这本书应该叫《Autolayout从入门到放弃》。
有种小学看红楼梦的感觉。但是“红楼梦”是好东西啊,就像 Autolayout 一样。事情总是有解决方法的:对于新手来说,入门 Autolayout 的捷径就是 Masonry。
什么是 Masonry
Masonry 是一个轻量级的布局框架,拥有自己的描述语法,采用更优雅的链式语法封装自动布局 简洁明了,并具有高可读性 而且同时支持 iOS 和 Max OS X。
如果我们使用原生的 Autolayout 代码,可能会有下面这一坨:
1
2
3
4
5
6
7
8
9
10
11
12
13
14
15
16
17
18
19
20
21
22
23
24
25
26
27
28
29
30
31
32
33
34
35
36
37
38
39
40
41
42
43
44
45
| UIView *superview = self.view;
UIView *view1 = [[UIView alloc] init];
view1.translatesAutoresizingMaskIntoConstraints = NO;
view1.backgroundColor = [UIColor greenColor];
[superview addSubview:view1];
UIEdgeInsets padding = UIEdgeInsetsMake(10, 10, 10, 10);
[superview addConstraints:@[
[NSLayoutConstraint constraintWithItem:view1
attribute:NSLayoutAttributeTop
relatedBy:NSLayoutRelationEqual
toItem:superview
attribute:NSLayoutAttributeTop
multiplier:1.0
constant:padding.top],
[NSLayoutConstraint constraintWithItem:view1
attribute:NSLayoutAttributeLeft
relatedBy:NSLayoutRelationEqual
toItem:superview
attribute:NSLayoutAttributeLeft
multiplier:1.0
constant:padding.left],
[NSLayoutConstraint constraintWithItem:view1
attribute:NSLayoutAttributeBottom
relatedBy:NSLayoutRelationEqual
toItem:superview
attribute:NSLayoutAttributeBottom
multiplier:1.0
constant:-padding.bottom],
[NSLayoutConstraint constraintWithItem:view1
attribute:NSLayoutAttributeRight
relatedBy:NSLayoutRelationEqual
toItem:superview
attribute:NSLayoutAttributeRight
multiplier:1
constant:-padding.right],
]];
|
但是如果你使用 Masory,那么你只需要这样:
1
2
3
4
5
6
7
8
| UIEdgeInsets padding = UIEdgeInsetsMake(10, 10, 10, 10);
[view1 mas_makeConstraints:^(MASConstraintMaker *make) {
make.top.equalTo(superview.mas_top).with.offset(padding.top);
make.left.equalTo(superview.mas_left).with.offset(padding.left);
make.bottom.equalTo(superview.mas_bottom).with.offset(-padding.bottom);
make.right.equalTo(superview.mas_right).with.offset(-padding.right);
}];
|
还能这样:
1
2
3
4
5
| [view1 mas_makeConstraints:^(MASConstraintMaker *make) {
make.edges.equalTo(superview).with.insets(padding);
}];[view1 mas_makeConstraints:^(MASConstraintMaker *make) {
make.edges.equalTo(superview).with.insets(padding);
}];
|
我就问你,这么简单的语法,明明白白的语义,你入不入坑?
Masory 简单原理
Masory 源码
Masory 的核心还是 Autolayout,通过编写 UIView 的分类(category)— View+MASAdditions。为我们正常使用的 UIView 添加了新的API。再使用 block 来进行布局定义,交付类 MASConstraintMaker 来进行管理。
说白了,就是把 Autolayout 进行封装和人性化。定义最最“弱智”的接口给我们用。
相当于把红楼梦拍成动画片。哈哈~
具体的实现还是要看源码啊~
Masory 的使用
Masory 与 Autolayout 的对应关系
| Masonry |
NSAutoLayout |
| view.mas_left |
NSLayoutAttributeLeft |
| view.mas_right |
NSLayoutAttributeRight |
| view.mas_top |
NSLayoutAttributeTop |
| view.mas_bottom |
NSLayoutAttributeBottom |
| view.mas_leading |
NSLayoutAttributeLeading |
| view.mas_trailing |
NSLayoutAttributeTrailing |
| view.mas_width |
NSLayoutAttributeWidth |
| view.mas_height |
NSLayoutAttributeHeight |
| view.mas_centerX |
NSLayoutAttributeCenterX |
| view.mas_centerY |
NSLayoutAttributeCenterY |
| view.mas_baseline |
NSLayoutAttributeBaseline |
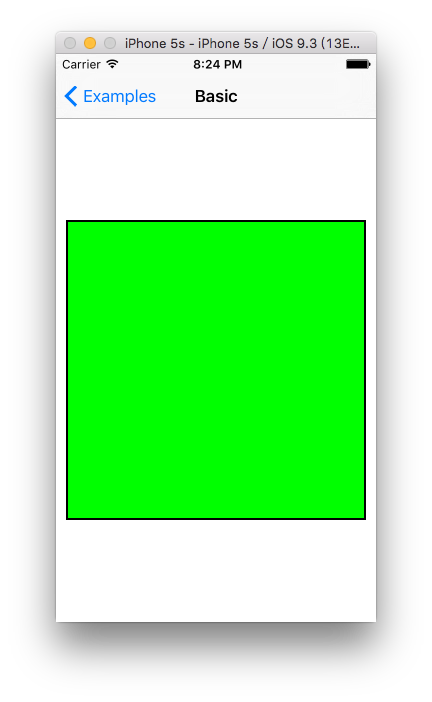
基础 – 居中显示一个view
1
2
3
4
5
6
7
8
9
10
11
12
13
14
15
| UIView *greenView = UIView.new;
greenView.backgroundColor = UIColor.greenColor;
greenView.layer.borderColor = UIColor.blackColor.CGColor;
greenView.layer.borderWidth = 2;
[self addSubview:greenView];
UIView *superview = self;
[greenView makeConstraints:^(MASConstraintMaker *make) {
make.center.equalTo(superview);
make.size.mas_equalTo(CGSizeMake(300, 300));
}];
|
代码效果:
补充:
在使用 masonry 的项目里面我们会看到 mas_equalTo 和 equalTo 是混合使用的,其实,二者还是有一定的区别的:
其实 mas_equalTo是一个MACRO.
1
2
3
4
5
| #define mas_equalTo(...) equalTo(MASBoxValue((__VA_ARGS__)))
#define mas_greaterThanOrEqualTo(...) greaterThanOrEqualTo(MASBoxValue((__VA_ARGS__)))
#define mas_lessThanOrEqualTo(...) lessThanOrEqualTo(MASBoxValue((__VA_ARGS__)))
#define mas_offset(...) valueOffset(MASBoxValue((__VA_ARGS__)))
|
可以看到 mas_equalTo 只是对其参数进行了一个BOX操作(装箱) MASBoxValue 的定义具体可以看看源代码.
所支持的类型 除了 NSNumber支持的那些数值类型之外 就只支持CGPoint CGSize UIEdgeInsets.
初级 – 让一个view略小于其superView
1
2
3
4
5
6
7
8
9
10
11
12
13
14
15
16
17
18
19
20
21
22
23
24
25
26
27
28
29
30
31
| UIView *greenView = UIView.new;
greenView.backgroundColor = UIColor.greenColor;
greenView.layer.borderColor = UIColor.blackColor.CGColor;
greenView.layer.borderWidth = 2;
[self addSubview:greenView];
UIView *redView = UIView.new;
redView.backgroundColor = UIColor.redColor;
redView.layer.borderColor = UIColor.blackColor.CGColor;
redView.layer.borderWidth = 2;
[greenView addSubview:redView];
UIView *superview = self;
CGFloat padding = 10.f;
[greenView makeConstraints:^(MASConstraintMaker *make) {
make.center.equalTo(superview);
make.size.mas_equalTo(CGSizeMake(300, 300));
}];
[redView mas_makeConstraints:^(MASConstraintMaker *make) {
make.top.equalTo(greenView).with.offset(padding);
make.left.equalTo(greenView).with.offset(padding);
make.bottom.equalTo(greenView).with.offset(-padding);
make.right.equalTo(greenView).with.offset(-padding);
*/
}];
|
代码效果:
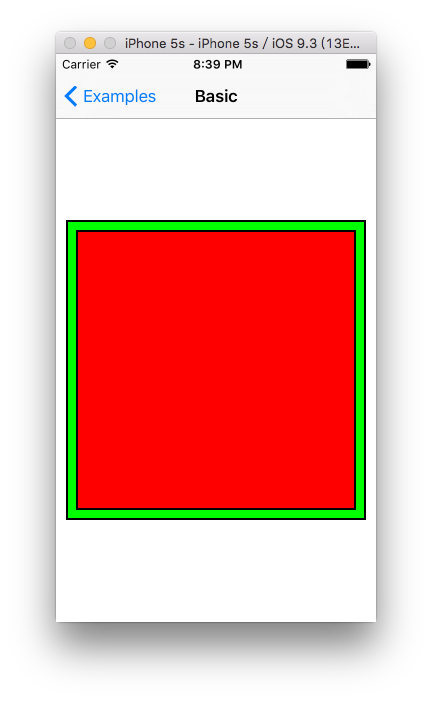
补充:
top,left,bottom,righ计算的是绝对的数值,计算的bottom 需要小于sv的底部高度 所以要-10 同理用于right。
初级 – 让两个高度一定的view垂直居中且等宽且等间隔排列
1
2
3
4
5
6
7
8
9
10
11
12
13
14
15
16
17
18
19
20
21
22
23
24
25
26
27
28
29
30
31
32
33
34
35
36
37
38
39
40
41
42
43
44
45
| UIView *greenView = UIView.new;
greenView.backgroundColor = UIColor.greenColor;
greenView.layer.borderColor = UIColor.blackColor.CGColor;
greenView.layer.borderWidth = 2;
[self addSubview:greenView];
UIView *redView1 = UIView.new;
redView1.backgroundColor = UIColor.redColor;
redView1.layer.borderColor = UIColor.blackColor.CGColor;
redView1.layer.borderWidth = 2;
[greenView addSubview:redView1];
UIView *redView2 = UIView.new;
redView2.backgroundColor = UIColor.redColor;
redView2.layer.borderColor = UIColor.blackColor.CGColor;
redView2.layer.borderWidth = 2;
[greenView addSubview:redView2];
UIView *superview = self;
CGFloat padding = 10.f;
[greenView makeConstraints:^(MASConstraintMaker *make) {
make.center.equalTo(superview);
make.size.mas_equalTo(CGSizeMake(300, 300));
}];
[redView1 mas_makeConstraints:^(MASConstraintMaker *make) {
make.centerY.mas_equalTo(greenView.mas_centerY);
make.left.equalTo(greenView.mas_left).with.offset(padding);
make.right.equalTo(redView2.mas_left).with.offset(-padding);
make.width.equalTo(redView2.width);
make.height.mas_equalTo(@150);
}];
[redView2 mas_makeConstraints:^(MASConstraintMaker *make) {
make.centerY.mas_equalTo(greenView.mas_centerY);
make.right.equalTo(greenView.mas_right).with.offset(-padding);
make.left.equalTo(redView1.mas_right).with.offset(padding);
make.width.equalTo(redView1.width);
make.height.mas_equalTo(@150);
}];
|
代码效果:

中级 – 在UIScrollView顺序排列一些view并自动计算contentSize
1
2
3
4
5
6
7
8
9
10
11
12
13
14
15
16
17
18
19
20
21
22
23
24
25
26
27
28
29
30
31
32
33
34
35
36
37
38
39
40
41
42
43
44
45
46
47
48
49
50
51
52
53
54
55
56
| - (id)init {
self = [super init];
if (!self) return nil;
UIScrollView *scrollView = UIScrollView.new;
self.scrollView = scrollView;
scrollView.backgroundColor = [UIColor grayColor];
[self addSubview:scrollView];
[self.scrollView makeConstraints:^(MASConstraintMaker *make) {
make.edges.equalTo(self);
}];
[self generateContent];
return self;
}
- (void)generateContent {
UIView* contentView = UIView.new;
[self.scrollView addSubview:contentView];
[contentView makeConstraints:^(MASConstraintMaker *make) {
make.edges.equalTo(self.scrollView);
make.width.equalTo(self.scrollView);
}];
UIView *lastView;
CGFloat height = 25;
for (int i = 0; i < 10; i++) {
UIView *view = UIView.new;
view.backgroundColor = [self randomColor];
[contentView addSubview:view];
[view mas_makeConstraints:^(MASConstraintMaker *make) {
make.top.equalTo(lastView ? lastView.bottom : @0);
make.left.equalTo(@0);
make.width.equalTo(contentView.width);
make.height.equalTo(@(height));
}];
height += 25;
lastView = view;
}
[contentView makeConstraints:^( MASConstraintMaker *make) {
make.bottom.equalTo(lastView.bottom);
}];
}
- (UIColor *)randomColor {
CGFloat hue = ( arc4random() % 256 / 256.0 );
CGFloat saturation = ( arc4random() % 128 / 256.0 ) + 0.5;
CGFloat brightness = ( arc4random() % 128 / 256.0 ) + 0.5;
return [UIColor colorWithHue:hue saturation:saturation brightness:brightness alpha:1];
}
|

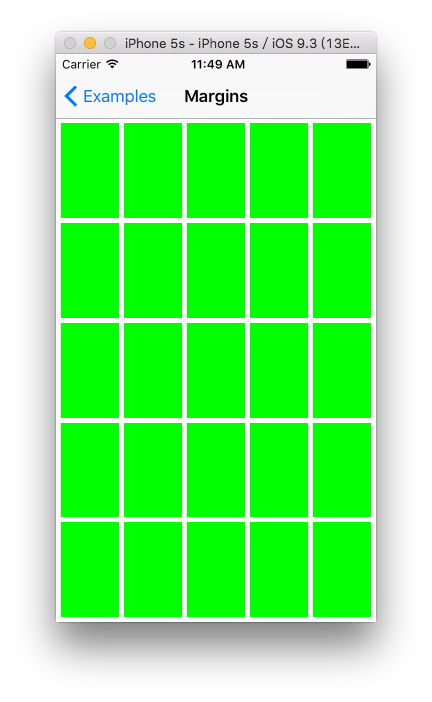
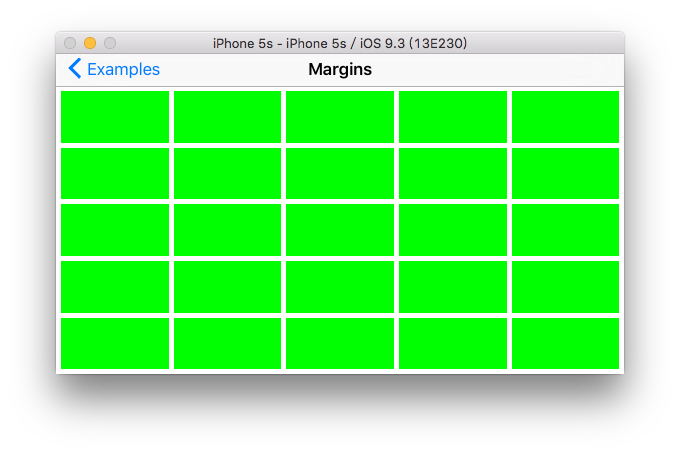
高级 – 根据屏幕宽高等宽等高等距离生成view
1
2
3
4
5
6
7
8
9
10
11
12
13
14
15
16
17
18
19
20
21
22
23
24
25
26
27
28
29
30
31
32
33
34
35
36
37
38
39
40
41
42
43
44
45
46
47
48
49
50
51
52
53
54
55
56
57
58
59
60
61
62
63
64
65
66
67
68
69
70
71
72
73
74
75
76
77
78
79
| - (instancetype)init {
self = [super init];
if (!self) return nil;
NSInteger count1 = 5;
NSInteger count2 = 5;
NSInteger margin = 5;
UIView * tempView1 = [[UIView alloc]init];
for (int k = 0; k < count1; k++)
{
UIView * fatherView = [[UIView alloc]init];
fatherView.backgroundColor = [UIColor clearColor];
[self addSubview:fatherView];
if (k == 0) {
[fatherView mas_makeConstraints:^(MASConstraintMaker *make) {
make.left.equalTo(self);
make.top.equalTo(self).offset(margin);
make.right.equalTo(self);
}];
}
else if (k == count2 - 1){
[fatherView mas_makeConstraints:^(MASConstraintMaker *make) {
make.right.equalTo(self);
make.left.equalTo(self);
make.top.equalTo(tempView1.mas_bottom).offset(margin);
make.height.equalTo(tempView1);
make.bottom.equalTo(self).offset(-margin);
}];
}
else{
[fatherView mas_makeConstraints:^(MASConstraintMaker *make) {
make.left.equalTo(self);
make.top.equalTo(tempView1.mas_bottom).offset(margin);
make.right.equalTo(self);
make.height.equalTo(tempView1);
}];
}
tempView1 = fatherView;
UIView * tempView2 = [[UIView alloc]init];
for (int i = 0; i < count2; i ++) {
UIView * childrenView = [[UIView alloc]init];
childrenView.backgroundColor = [UIColor greenColor];
[self addSubview:childrenView];
if (i == 0) {
[childrenView mas_makeConstraints:^(MASConstraintMaker *make) {
make.left.equalTo(fatherView).offset(margin);
make.top.equalTo(fatherView);
make.bottom.equalTo(fatherView);
}];
}
else if (i == count2 - 1){
[childrenView mas_makeConstraints:^(MASConstraintMaker *make) {
make.right.equalTo(fatherView).offset(-margin);
make.left.equalTo(tempView2.mas_right).offset(margin);
make.width.equalTo(tempView2);
make.top.equalTo(fatherView);
make.bottom.equalTo(fatherView);
}];
}
else{
[childrenView mas_makeConstraints:^(MASConstraintMaker *make) {
make.left.equalTo(tempView2.mas_right).offset(margin);
make.top.equalTo(fatherView);
make.bottom.equalTo(fatherView);
make.width.equalTo(tempView2);
}];
}
tempView2 = childrenView;
}
}
return self;
}
|
代码效果:
竖屏:
横屏:
最后的话
masonry 真的为 autolayout 带来了许许多多的方便之处,更深的使用和研究还是要大家自己去探索!